
Category: Food Blog

Red Lentils curried(meethi, sweet, Dal) with Caramelized Onions
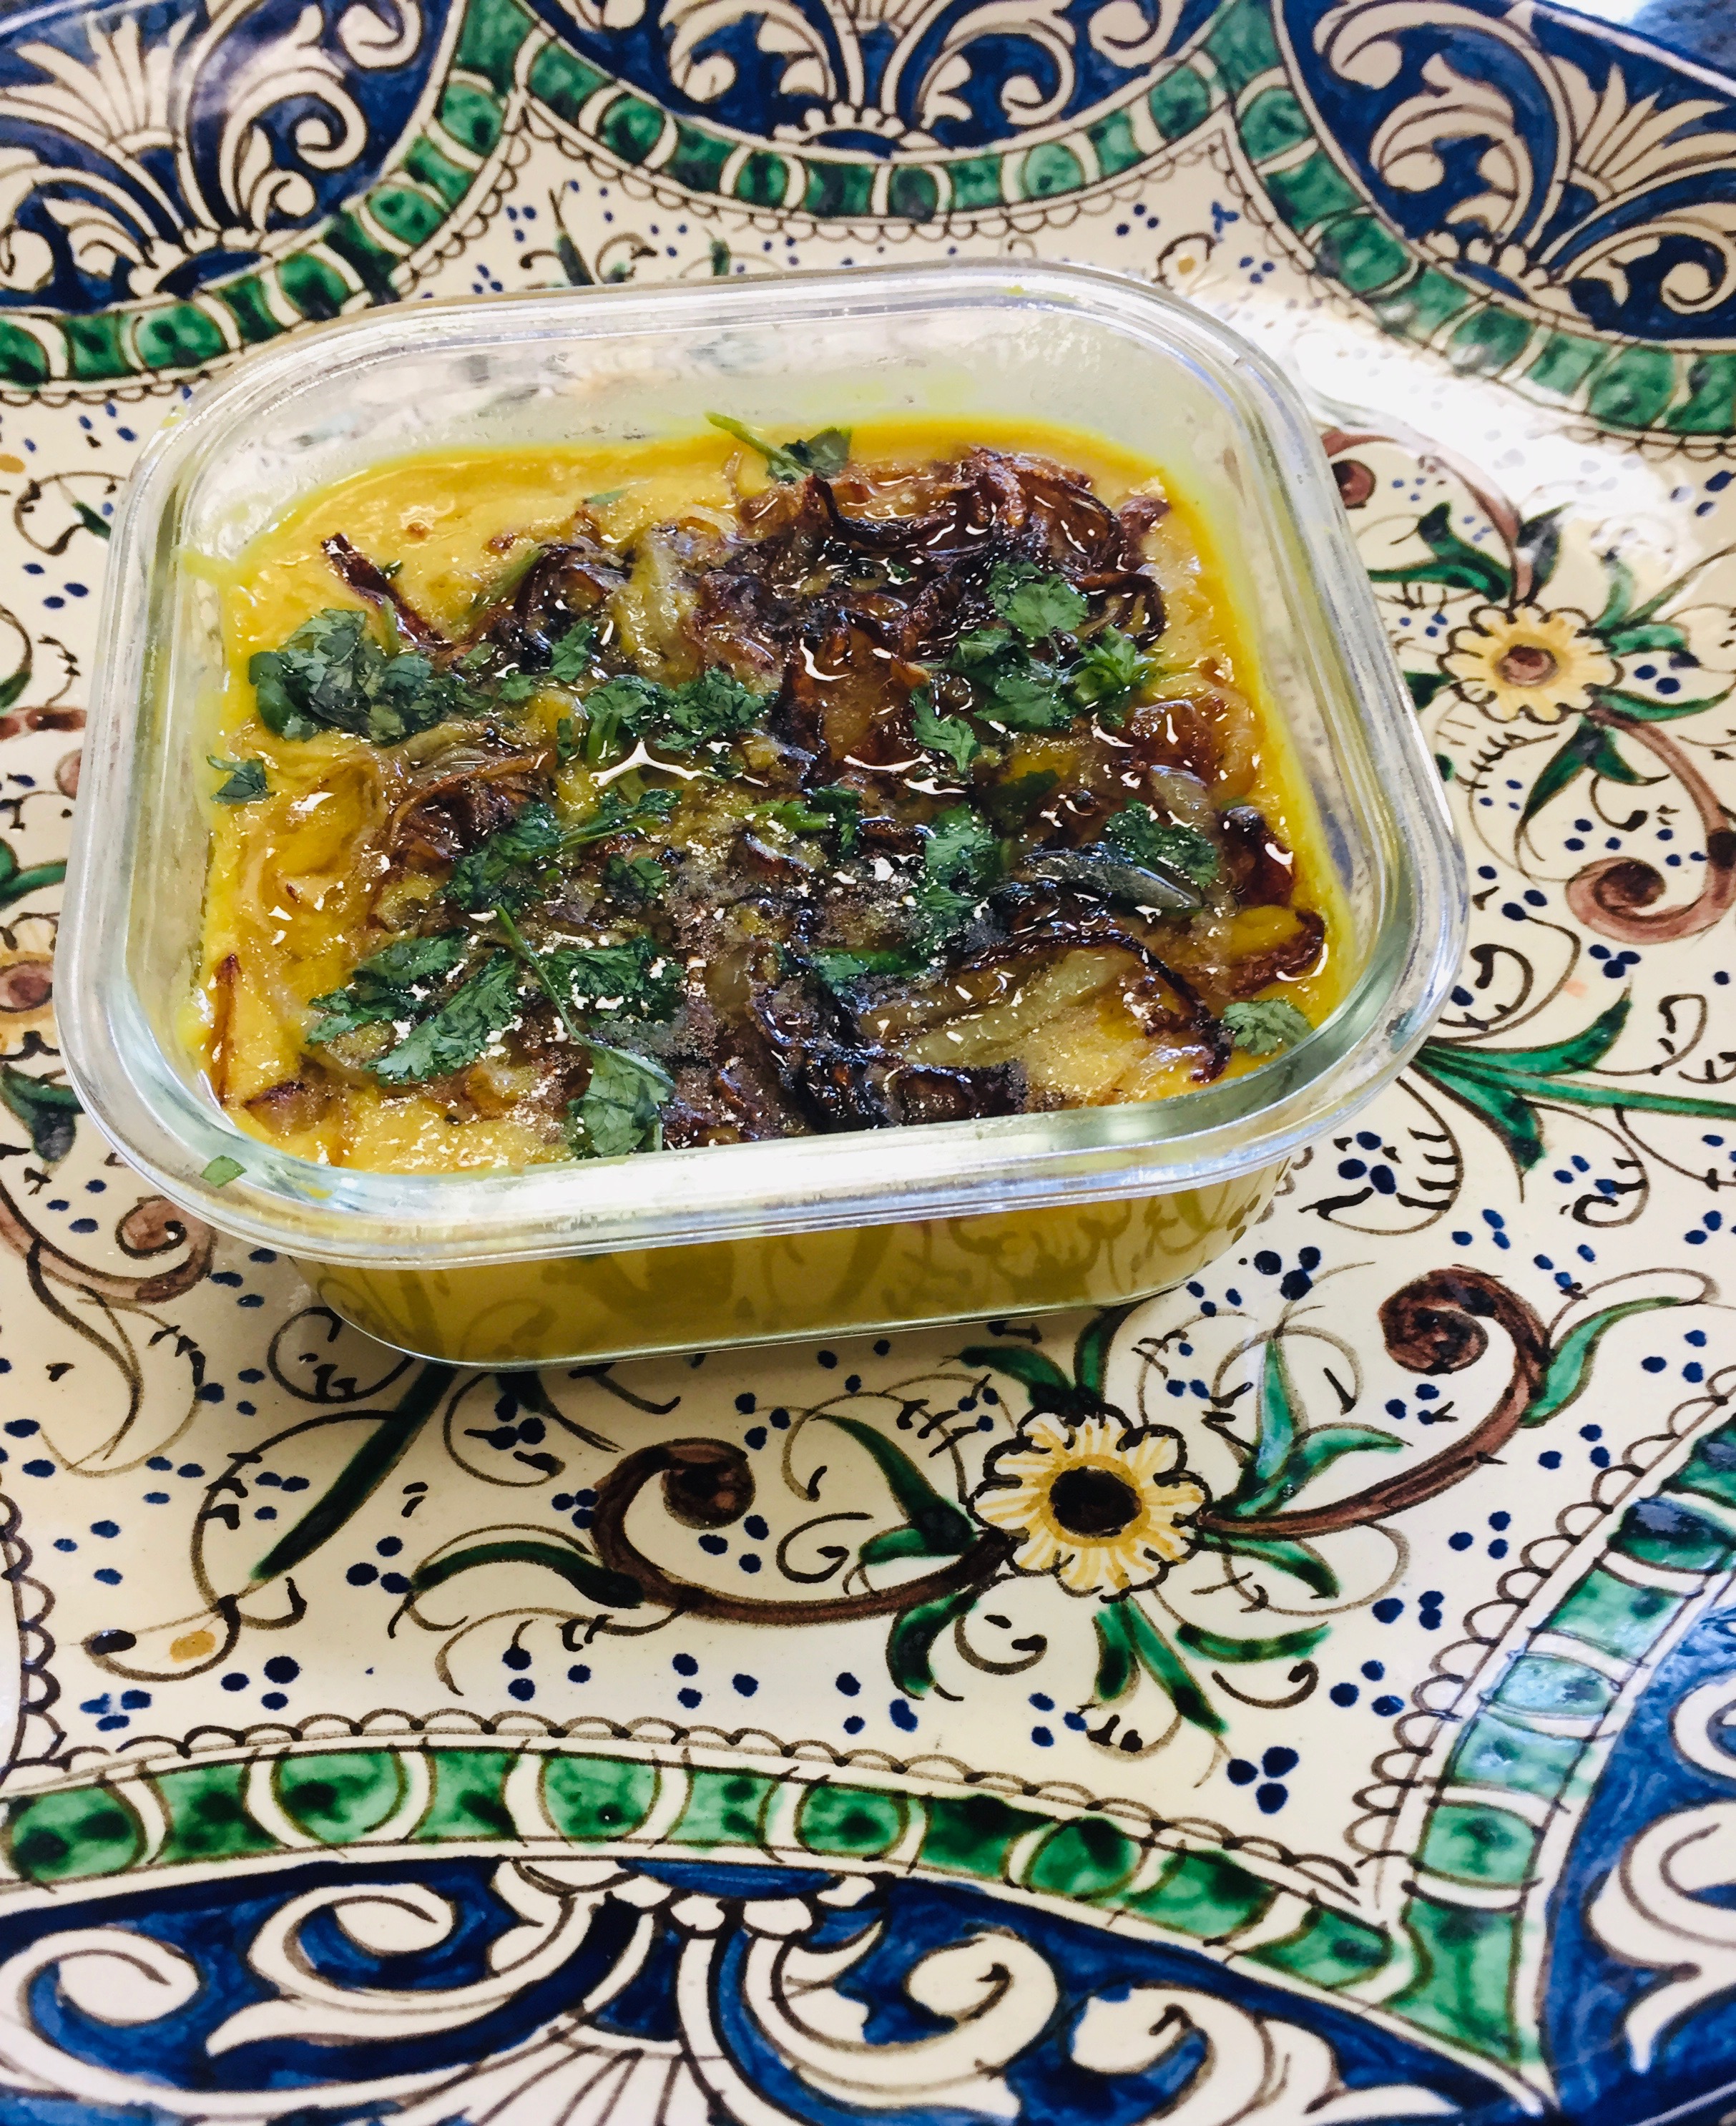
Red Lentils curried(meethi, sweet, Dal) with Caramelized Onions

This lentil dish with very few ingredients is a delicacy. Although part of the name translates to sweet but no sugar is added. Since there is no sour ingredient, such as tomato, lemon, or tamarind hence the name. It should be light, fluffy, creamy, rich and decadent topped with caramelized onion which largely contributes to its sweetness. It is extremely popular because of its finger licking good taste and its versatility. It can be served with any Indian meal combos, and also enjoyed when served on its own with rice or roties (Indian bread).
Prep Time 10 minutes
Cook Time 30 minutes
Total Time 40 minutes
Servings: 6
Course: Side Dish
Cuisine: Indian

Ingredients
  

Main recipe
  • 1 cup red lentil, washed well and soaked in enough water for 20 minutes.
  • 1 cup or enough water to barely cover the lentil.
  • ½ teaspoon turmeric powder
  • ½ teaspoon ginger/garlic paste all Indian stores have the product. you can also mince fresh ginger and garlic in equal amount
  • 1 teaspoon level spoon salt
Garnish
  • 1 small onion, very finely sliced
  • 4 tablespoons olive oi
  • 3 to 4 small green chilies, coarsely cut
  • 1 tablespoon fresh cilnatro, finely chopped

Method
 

Main recipe:
  1. In a bowl, wash well and soak lentils for 20 to 30 minutes.
  2. When ready to cook, add washed and drained lentils into a saucpan, add water to barely cover lentils.
  3. Add turmeric powder, and ginger/garlic paste and stir to mix.
  4. Cook on medium heat until lentils are tender. Red lentil cooks very fast.
  5. Remove from heat when soft, season to taste with salt, and transfer to a blender, or use an immersion blender to puree it. If too thick, add some water to loosen it without making it watery. Should not be watery.
  6. If using a blender, return to the suacepan and bring it back to a quick boil. Lower heat and simmer until it is rich and creamy. Stir a few times making sure to get the desired consistency. Transfer to serving bowl.
Garnish:
  1. Meanwhile, in a small skillet, Heat oil, add sliced onion and fry stirring until it is caramelized. You shoud stay with it lest it burns. There is a fine line between it being brown and being burnt.
  2. Top the prepared dal mixture evenly with coarsely cut green chilies, and chopped cilantro.
  3. Pour the caramelized onion with all its oil on top of herb garnish.
  4. Serve as a side dish with any meal. It is extremely versatile.
Notes

Next
 
Previous:


Legumes Love Affair

All About Lentils

Lentils

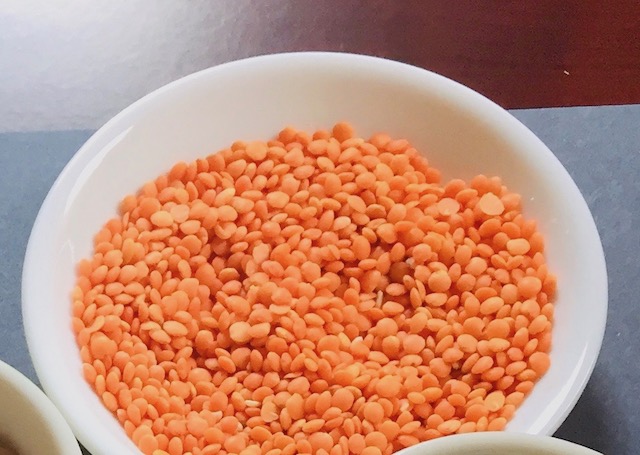
A large number of Indians are vegetarians, and legumes are a very important and staple part of their diet. But even the non-vegetarian, who are also in a large numbers, if not larger than vegetarians, include legumes of all kinds in their diet, and prepare them in an unfathomable variety of delicious recipes. Lentils are also known as pulses, and are part of the legume family. Under the umbrella of legume are the plants which produce edible seeds such as lentils, beans, chick peas, soy beans, peanuts, and more. All dried legumes also grow in pods, and are referred to, by a lot of Indians, as daals, or pulses, and they are mostly the split and skinned  versions of lentils. The image above indicates the type of daal which are most popular. Red lentil is one of the most popular because it cooks very fast, and it changes to yellow as it cooks and falls apart very quickly making  it easy to prepare. Most other lentils (daals ) are not super hard to cook either. If you have time constraints, pressure cooker is a handy tool in any kitchen.

The popularity of lentils in vegetarian diet stems from the fact that they replace the meat portion by successfully providing the required proteins, which are essential for a balanced diet.  Apart from being a source of proteins, they are excellent source of folate, manganese, B1, B6, potassium, and fibre, making them very desirable for a balanced diet and good health.

There are some special recipes for lentils (daals, pulses) in which whole seeds are used for a  unique taste and color. Dal Makhani, and Kali daal are made with whole Urad which is white in its split version (urad) but has black skin and is called black gram. Skin  contributes to the luxurious appearance and texture of these dishes. Lentils have always been very popular but have gained popularity because of the emerging trends on the  vegan and vegetarian front around the world. So much so that it has become a predominantly visible ingredient in many cuisines across the globe, most notably throughout the Middle east, and also in Mediterranean cuisine. They are so versatile that possibility of their use in all courses on daily menus are endless. 

 Red lentils are an go-to ingredient in general, may be for the ease of cooking to save time,  but may also be for its preferred taste in some of the daal preparation such as, kahatti daal, and dry pasty daal called Mitthi (sweet) dal. But for recipes such as Samber, toor (archer) daal is used traditionally and is recommended. But traditionally dalcha has always been made with chana daal, bone-in lamb, eggplant or gourd to serve with vegetable palau (pilaf). Therefore, there are traditional norms for using certain varieties of daals for certain preparation and most people follow it. In my future posts I will include my favorite legumes (lentils, beans, etc.) and how they are used in daily diets by scores of people.

Mixed Vegetable Curry

Mixed Vegetable Curry

This is a very tasty and healty dish. Though the recipe is simple, It requires careful reading and having everything in place to ease the process. Any recipe is a cinch once you follow direction properly, at least, when you do it the very first time.
Prep Time 20 minutes
Cook Time 25 minutes
Total Time 45 minutes
Servings: 4 people

Ingredients
  

  • ½ medium cauliflower
  • ¼ Cup olive oil, oil of your choice
  • ½ medium white onion finely sliced or chopped
  • 4 cloves garlic minced
  • 2 medium potatoes quartered
  • 1 medium carrot Cut in discs
  • 1 teaspoon red chili powder
  • 1 teaspoon corinader powder
  • 1 teaspoon cumin powder
  • 1 teaspoon curry powder
  • 1 teaspoon salt
  • 1 teaspoon black pepper
  • 2 medium serrano chilies

    seeded and cut in strips

  • ½ red bell pepper

     cored, seeded, and julienned

  • ½ green bell pepper

     cored, seeded, and julienned

  • 1 fresh Zucchini

    ends removed and cut in 2×4 inch size diagonal pieces

  • 1 long, thin eggplant

    ends removed and cut in 2×4 inch size diagonal pieces

  • 1 tablespoon cilantro freshly chopped, divided
  • 1 tablespoon mint freshly chopped, divided

Equipment

  • Cast iron skillet or any bigger size suacepan or even a wok will work

Method
 

  1. Heat oil in a cast iron skillet, and add onion, garlic, potatoes, and carrots. Cook stirring on medium heat making sure not to burn. Add cauliflower and continue to cooking. Stir frequently for even cooking .
  2. Add all the spices, chopped serrano chilies, and ½ tablespoon each of cilantro and mint reserving the other half for garnish. Cook stirring to fry the contents for 1 minute.
  3. Add ½ cup broth, lower heat, cover and cook to get the potatoes fork tender, about 5 to 7 minutes.
  4. Add julienned bell pepper, stir and cook for 2 minutes.
  5. Remove from the heat and set aside. 
  6. Heat enough oil in a fryer or a deep saucepan and deep fry eggplant only about one or two minutes transfer to a well lined sieve to drain. 
  7. In the same oil, after adjusting heat, deep fry Zucchini. Zucchini takes slightly, but only very slightly, longer than eggplant. Alos transfer fried zucchini to another well lined sieve to drain. Season with both salt and pepper taking care not to over salt.
  8. Transfer cauliflower mixture to a serving bowl.
  9. Arrange peppers, zucchini, and eggplant on top for decorative effect.
  10. Serve with white rice, chapaties (Indian tortillas), as a accompaniment to a main meal. 
  11. It is so delicious that it can be enjoyed as is for a snack or as a light meal.

Notes

How to cut cauliflower
Begin by cutting cauliflower in half starting at the top and right through the core. All the florets are attached to the core with their own stems. Use  a pointed knife to remove the florets from the core by cutting them away. you can further cut the florets into desired sized pieces. The core can also be used by thinly slicing it for facilitate the cooking. Remember to add the stem pieces a little before the florets to adjust the cooking time. Also it is important to wash cauliflower core and floret to remove any grit it may have hidden in nooks and crannies before cooking. 

Frangipane Peach Tart

Frangipane Peach Tart

Frangipani is a delicious, exotic French filling made with ground almonds. It is extremely versatile. I use it in a variety of tarts. Bakewell tart is one of the most popular in which frangipane paste is the top layer over the jam filling. In a peach tart, or other fruit tarts fruit slices are arranged in a pattern on top of the frangipane which cooks around the fruit leaving the design you created completely untouched.
Prep Time 45 minutes
Cook Time 35 minutes
Total Time 1 hour 20 minutes
Servings: 8 people
Course: Dessert
Cuisine: French

Ingredients
  

Crust for the Tart:
  • 2 1/2 Cups all-purpose flour
  • 2 sticks unsalted butter
  • ¼ cup powdered sugar
Frangipane:
  • 2/3 cup finely ground almonds
  • 1/2 cup granulated sugar
  • 1/2 teaspoon salt
  • 1/2 teaspoon almond extract
  • 6 tablespoons unsalted, room temperatuer butter
  • 1 large room temperature egg
  • 2 tablespoons all-purpose flour
  • 1 tablespoon granulated sugar for topping
  • 2 ripe peaches, peeled and sliced
Apricot Glaze
  • 1 cup Apricot preserve

Equipment

  • Removable bottom cake tin, Stand up mixer, baking sheet to set the cake tin in.

Method
 

Crust for the Tart:
  1. In a food processor, add 2½ cups all purpose flour, 2 sticks room temperature butter, and powdered sugar.
  2. Process to combine. It will come together as crumbly dough.Tranfer to a parchment paper and bring all the loose flour to form a smoother disc. Wrap and regrigerate for 30 to 40 minutes.
Frangipane:
  1. Meanwhile, process the frangipane ingredients in a paste and set it aside.
  2. Cut an x on top of each peach and drop them into enough boiling water to cover them. After 1 minutes transfer into an ice bath( bowl of ice water). usually peel literally falls off the fruit. If not use a knife to remove the peel. Cut thin slices and discard the seeds.
  3. When ready to assemble, remove the dough from the refrigerator and knead a little and roll to fit the cake pan. If the dough is a little hard to work with just fit it by cutting rolled dough into manageable size pieces. Refrigerate for 15 minutes to firm it up. I put mine in the freezer for 10 minutes.
  4. Remove cooled crust lined cake pan from the refrigerator and evenly spread the frangipane paste in the bottom using and offset spatula or a dinner knife.
  5. Arrange peach slices in your favorite design. Evenly sprinkle sugar on the top.
  6. Bake in a preheated 325°F oven for 35 to 40 minutes. Keep an eye on it so it does not overbrown.
  7. Remove from the oven and let it come to room temperature. Since it is a removable bottom, extra care is necessary when transferring to a rack to cool.
Apricot Glaze:
  1. In a small sauacepan, heat apricot glaze stirring until it is loosen up with no lumps making it easy to spread with a pastry brush.
  2. When the cake comes to room temperature generaously apply apricot glaze and refrigerate overnight or at least 4 hours, before cutting into it.

Pears in Red Wine Sauce

Pears in Red Wine Sauce

This classic recipe is real simple to make. Firm and fresh pears are poached in a spicy wine sauce until tender. Wine sauce then is reduced to a pouring glaze consistency to pour over individual servings. This classy dessert is further enhanced by the addition of either a scoop of favorite ice cream or whipped cream.
Prep Time 10 minutes
Cook Time 1 hour 30 minutes
Total Time 1 hour 40 minutes
Servings: 410
Course: Dessert
Cuisine: French

Ingredients
  

  • 4 Firm Pears (Bosc, Anjou, or Bartlett) peeled and stems attached
  • 2½ cups red wine (Merlot)
  • 2½ cups water
  • 2 pieces cinnamom
  • 4 whole cloves
  • 1 cup brown sugar (packed)

Equipment

  • Dutch oven, sieve

Method
 

  1. Peel the pears. Use a melon baller to scoop the core of each pear from the bottom. Make sure to leave the stem attached.
  2.  In an appropriate sized Dutch oven, add red wine, water, cinnamon, cloves, and sugar. Stir well.
  3. Add the pears and heat until the liquid comes to a simmering boil.
  4. Cover and let the pears simmer in wine sauce for, at least, one hour.
  5. Remove from heat and carefully transfer pears to a serving bowl leaving all the sauce in the saucepan.
  6. Return the saucepan to the heat and continue simmering the mixture on medium heat until it is reduced to a glaze consistency.
  7. Strain through a sieve and discard the solids.
  8. To serve pour the glaze on individual servings.
  9. A scoop of ice cream, or whipped cream on the side is a great way to serve this simple, and yet an exotic dessert.

Macarons

Macarons

These hard to make dainty little cookies are very popular even among fussy kids. With very few ingredients, these cookies are delicious, light, crispy outside and chewy inside. Almond powder and egg white contribute to their melt in your mouth quality. Recipe requires older, room temperature egg whites for its stiff meringue. Almond powder needs to be extra fine and smooth for a perfectly smooth finish to the cookie. Measuring and sifting through a fine mesh sieve without pressing at the end is important. You can discard the last few particles.
Prep Time 35 minutes
Cook Time 35 minutes
Servings: 12
Course: Snack
Cuisine: French
Calories: 100

Ingredients
  

Dry Ingredients:
  • 1 Cup confectioners sugar
  • 2/3 Cup almond powder
Wet Ingredients:
  • 2 large egg whites, room temperature
  • ¼ teaspoon salt
  • ¼ cup superfine sugar
  • 2 to 3 drops desired food color, gel color
Filling:
  • 1/4 cup butter cream, jam, ganache, or any desired filling ,your preference.

Equipment

  • 13×8 BakingTray (2)
  • Piping bag
  • Stand mixer
  • food processor

Method
 

  1. preheat oven to 300°F.
  2. Line 2 baking trays with parchment paper and set aside.
  3. Measure confectioner sugar and almond powder in a bowl by spooning into a measuring cup and leveling off with a knife. Whisk to combine.
  4. Using fine mesh sieve, sift confectioner sugar and almond powder and discard impurities. Whiz the dry ingredients in a food processor and sieve again. Repeat the process one more time to get very refined dry ingredients.
  5. In a stand mixer beat egg whites and salt until frothy. Start adding sugar and continue to beat until the meringue reaches soft peak stage. Add desired gel food color at this point. Continue to beat until meringue reaches stiff peak stage.
  6. Transfer the stiff meringue on top of the dry ingredients. Start folding carefully to prevent deflating the egg whites. Folding is done by cutting the mixture vertically through, bringing the spatula across the bottom of the bowl and up the nearest side pressing gently. Fold until thoroughly incorporated. Do it by turning the bowl and scraping down the bowl until mixture is free of lumps. You will know that it is ready when it drizzles to form thin ribbons which do not break when you make a figure 8 with it.
  7. Fit the pastry bag with round, #12 tip and fill the bag with the prepared batter.
  8. Use some of the batter under each corner of the parchment paper to keep it in place in the baking tray.. Start piping uniform 1 ¼ inch circles on the prepared baking tray, 12 on each tray. Firmly tap the tray on the work surface to remove any bubbles. Let the cookies stand at room temperature for 2 hours or more for the shells to dry out.
  9. Bake on a double baking tray to prevent burning. Bake for in a 300°F oven for 15 to 17 minutes turning half way through for even cooking. Bake one tray at a time and remove to a rack to cool completely.
  10. Pipe filling onto the back of half the shells and use the other half to make a sandwiches.
  11. They are best consumed within 24 hours at room temperature. Can be refrigerated for 2 to 3 days in an air tight container. Can be frozen for longer, but better to freeze the shells without filling in an air tight container. When ready to use, remove from the freezer ahead of time and then assemble with desired filling to serve.

Date Brownies

This is a very easy recipe. All ingredients are blended and poured in a baking tray to bake in a 325° F. oven for 50 minutes. After it comes to room temperature, cut in wedges and serve. Great tea time treat or a snack for chocolate lovers.
Prep Time 20 minutes
Cook Time 50 minutes
Total Time 1 hour 10 minutes

Ingredients
  

  • 2 cups pitted dates finely chopped
  • 3/4 Cup boiling water
  • 1 teaspoon baking soda
  • 6 1/2 ounces room temperature butter cut in chunks
  • 2 cups sugar
  • 4 large eggs
  • 1 Cup Dutch cocoa powder
  • 1 cup flour
  • 1/2 teaspoon baking powder
  • 2 teaspoons vanilla
  • 8 ounces dark milk chocolate finely chopped

Equipment

  • 13×8 BakingTray

Method
 

  1. Preheat oven to 325° F.
  2. Put finely chopped dates in a large bowl.
  3. Add boiling water and baking soda, stir well.
  4. Add 6½ ounce chunks butter and stir. Set aside for 20 minutes until butter melts.
  5. Add sugar and stir to dissolve the sugar. While stirring add four eggs and continue to stir to incorporate eggs in the mixture.
  6. Add Dutch cocoa powder, flour, baking powder, vanilla, and finely chopped milk chocolate and stir to blend all the ingredients.
  7. Line your baking tray with parchment along the length and width making a cradle to make it easy to lift the brownies out to a rack. Pour the batter into parchment lined, greased baking tray and bake in a 325° F. preheated oven for 50 minutes.
  8. When done, remove from the oven and let it cool before cutting into desired sized pieces to serve.
  9. Can be served sprinkled with powdered sugar, with ice cream, whipped cream, or fudge sauce.
  10. Can be refrigerated in a container with a tight lid and use as needed.

Notes

Click here for information on cocoa powder